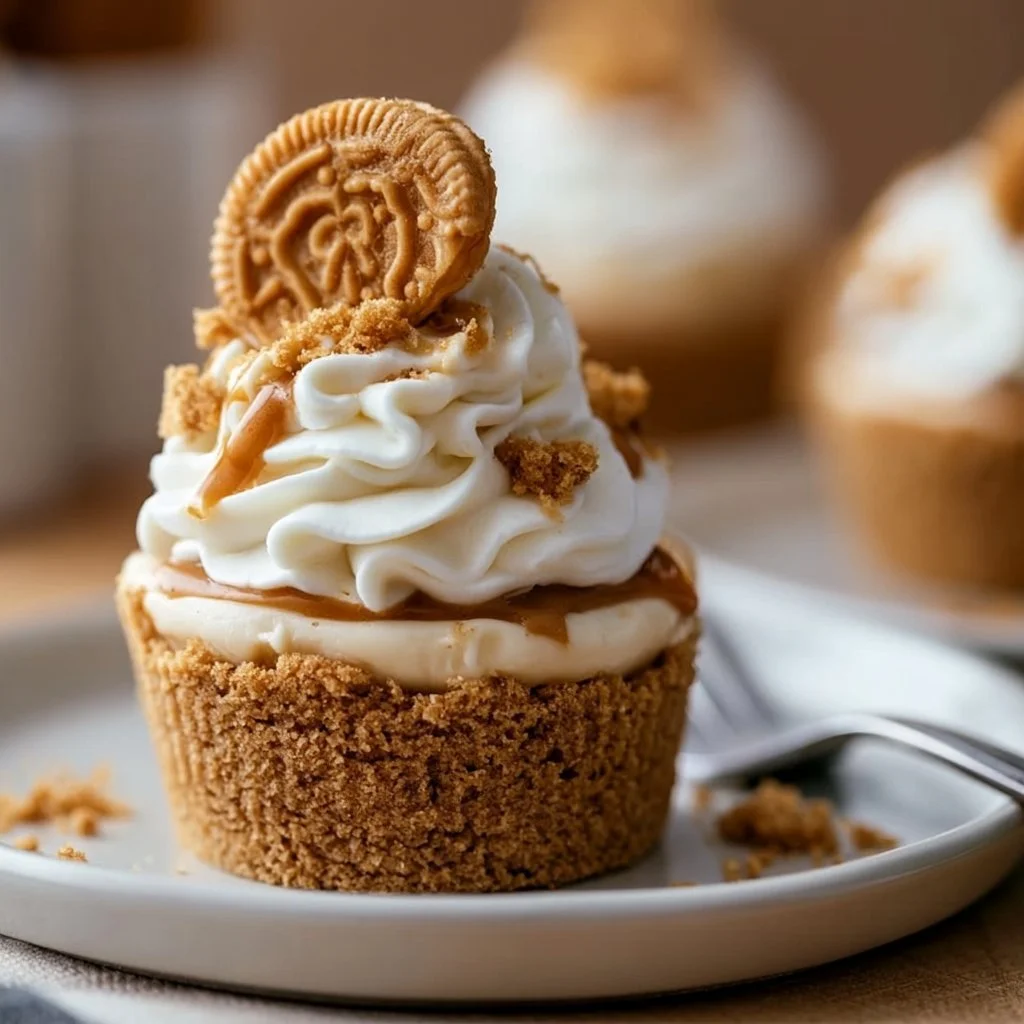
No-Bake Cookie Butter Cheesecake Cups
An Irresistible Treat You’ll Want to Dive Into
Picture this: a creamy, dreamy dessert with a cookie butter twist that’s so simple, you won’t believe it. Say “hello” to No-Bake Cookie Butter Cheesecake Cups! These little cups of bliss are perfect for satisfying your sweet tooth without turning on the oven. Trust me; you’ll be hooked after one bite!
Why Make This Recipe
Why should you whip up these cheesecake cups? Here are a few tasty reasons:
- No Baking Needed: Just mix and chill — seriously, it’s that easy. Who doesn’t want a dessert with minimal effort?
- Quick Cleanup: They’re made in cupcake liners, which means less scrubbing later. Your future self will thank you!
- Family-Friendly Fun: Great for kids and adults! Plus, they look super cute, making them perfect for parties.
Ingredients
You don’t need fancy stuff — just these basics!
- 1 1/2 cups graham cracker crumbs
- 1/4 cup melted butter
- 2 tbsp granulated sugar
- 8 oz cream cheese, softened
- 1/2 cup cookie butter
- 1/2 cup powdered sugar
- 1 tsp vanilla extract
- 1 cup whipped topping
- Extra cookie butter drizzle
- Whipped cream (for topping)
- Crushed graham crackers (for garnish)
Directions
- In a bowl, mix the graham cracker crumbs, melted butter, and granulated sugar until well combined. Press about 1 tablespoon of the mixture into the bottom of each cupcake liner to form the base. Chill in the fridge while you prepare the filling.
- In a large bowl, beat the softened cream cheese until smooth. Add the cookie butter, powdered sugar, and vanilla extract. Mix until fully combined and creamy.
- Gently fold in the whipped topping until the filling is light and fluffy. Be careful not to overmix.
- Spoon or pipe the filling into the prepared cupcake liners, filling each one to the top. Smooth the tops with a spatula or the back of a spoon.
- Chill the cheesecake cups in the fridge for at least 2 hours, or until set.
- Once chilled, garnish with a drizzle of extra cookie butter, whipped cream, or crushed graham crackers if desired.

How to Make No-Bake Cookie Butter Cheesecake Cups (Overview)
Let’s break it down, shall we? You start by creating a crumbly base for your cheesecake cups. Mix graham crackers, butter, and sugar, then press that goodness into cupcake liners. Chill to set!
Next, you whip up a creamy filling with cream cheese and cookie butter, folding in whipped topping for that fluffy texture. Fill the liners to the top with this dreamy mixture, then chill for a couple of hours! Don’t skip the chilling time — it makes all the difference between a runny mess and a perfect treat. 😋
How to Serve No-Bake Cookie Butter Cheesecake Cups
Serve these delightful cups as they are, or take it up a notch! Think:
- A drizzle of warm cookie butter on top for that melty, gooey goodness.
- A swirl of whipped cream for extra flair.
- Sprinkle some crushed graham crackers for a delightful crunch.
They look super appetizing and smell heavenly, making them a hit for any event!
How to Store No-Bake Cookie Butter Cheesecake Cups
These cheesecake cups are perfect for make-ahead treats! Store them in an airtight container in the fridge for up to 5 days. Need to stash some away? They freeze well too! Just thaw in the fridge before serving, but remember they might lose a bit of that light, fluffy texture.
Tips to Make No-Bake Cookie Butter Cheesecake Cups
Here are some quick tips to elevate your cheesecake cup game:
- Soften the Cream Cheese: Ensure your cream cheese is softened for the smoothest filling. No one wants a lumpy cheesecake.
- Customize the Tops: Switch things up with different toppings like caramel sauce or chocolate drizzles.
- Make It Ahead: Prepare these the day before your gathering. They taste even better after sitting in the fridge!
Variation
Want to swap it up? Try a peanut butter version instead of cookie butter for a different flavor explosion! Or, make it vegan by using plant-based cream cheese and whipped toppings. The possibilities are endless! 🌟
FAQs
Can I use low-fat cream cheese?
Absolutely! Low-fat cream cheese works well, just keep in mind it may change the texture slightly.
How can I make these gluten-free?
Use gluten-free graham crackers; they taste just as delicious in this recipe!
Can I make these cupcakes smaller?
Sure thing! Just adjust the portion sizes and chilling time accordingly. They’ll be adorable bite-sized treats!
📌 Pin this recipe for your next cozy dinner night!
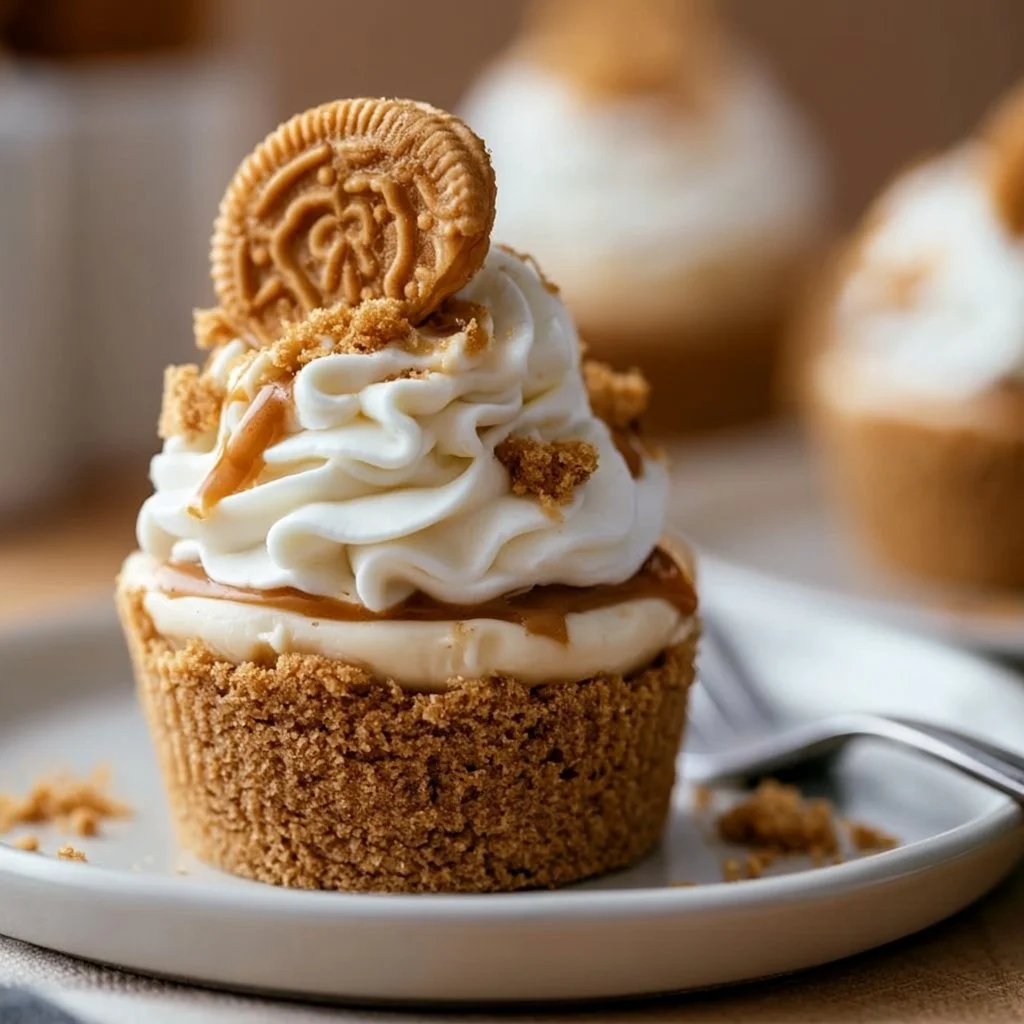
No-Bake Cookie Butter Cheesecake Cups
Ingredients
Method
- In a bowl, mix the graham cracker crumbs, melted butter, and granulated sugar until well combined.
- Press about 1 tablespoon of the mixture into the bottom of each cupcake liner to form the base.
- Chill in the fridge while you prepare the filling.
- In a large bowl, beat the softened cream cheese until smooth.
- Add the cookie butter, powdered sugar, and vanilla extract. Mix until fully combined and creamy.
- Gently fold in the whipped topping until the filling is light and fluffy. Be careful not to overmix.
- Spoon or pipe the filling into the prepared cupcake liners, filling each one to the top.
- Smooth the tops with a spatula or the back of a spoon.
- Chill the cheesecake cups in the fridge for at least 2 hours, or until set.
- Once chilled, garnish with a drizzle of extra cookie butter, whipped cream, and crushed graham crackers, if desired.